Settings
Navigation: Sidebar → Settings
BillingOne Settings let you configure your billing integrations, manage your profile, and adjust organization settings. The settings sidebar includes all the options relevant to billing operations.
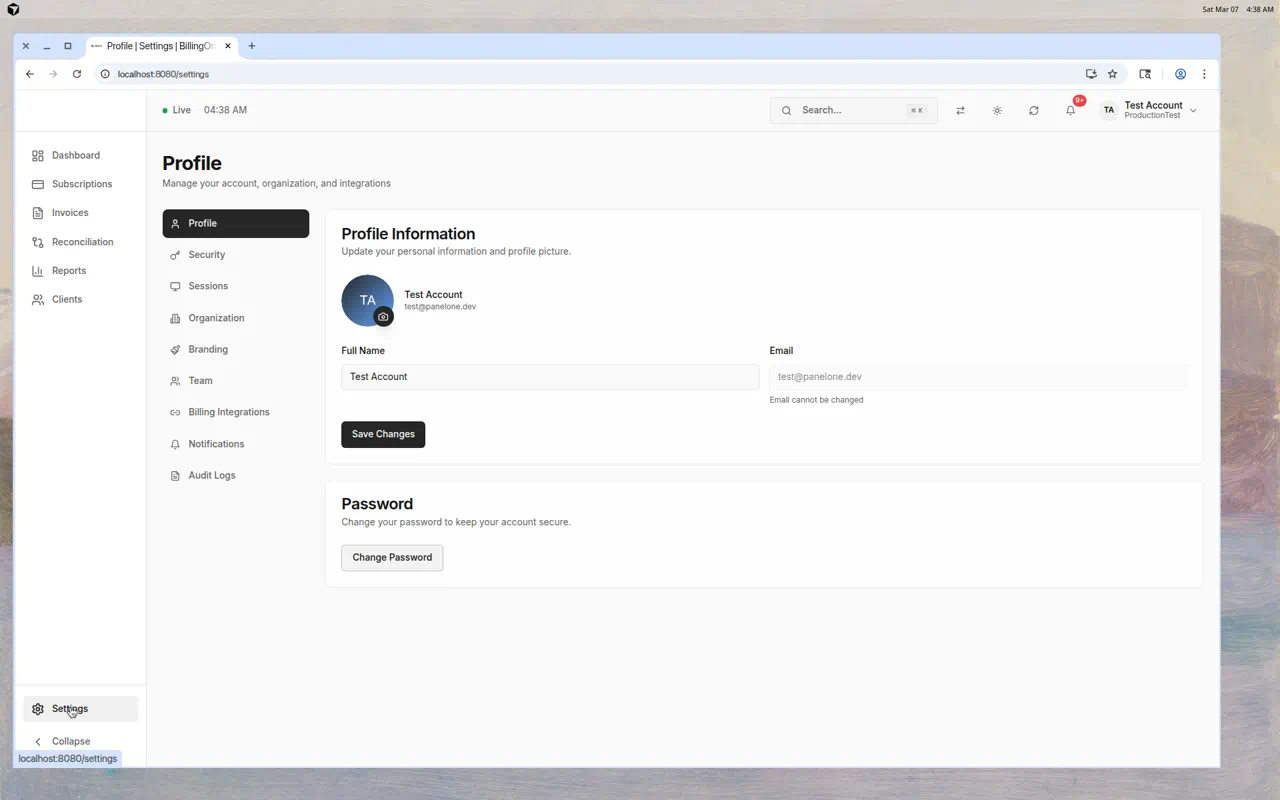
Settings Sections
Profile
Update your personal information:
- Full Name — Your display name
- Email — View your account email (cannot be changed here)
- Profile Picture — Upload or change your avatar
Staff passwords live on PartnerOne sign-in (login.partnerone.dev), not as a separate BillingOne password.
Security
Staff sign-in security is managed through PartnerOne sign-in:
- MFA — You must set up and use a second factor to access PartnerOne apps. Your organisation can't switch MFA off. See Sign in and set up MFA.
- Passkeys — Register from PartnerOne Admin; a passkey works on Admin and the login site only. BillingOne still needs an authenticator app
- Recovery codes — Always shown after enrolment; see Recover access with a recovery code
Sessions
View and manage active sessions:
- See which devices are signed in
- Terminate sessions you don't recognize
Organization
Manage organization-level settings:
- Organization name and URL slug
You must set up and use a second factor to access PartnerOne apps. Your organisation can't switch MFA off.
Branding
Customize BillingOne's appearance:
- Upload your MSP logo
- Set custom colors
Team
Manage team members:
- Invite people from PartnerOne Admin Members
- Assign PanelOne/BillingOne team roles (Owner, Admin, Engineer, Viewer, Finance) after the first sign-in — IdentityOne permission only controls whether they can open the app
- Remove team members
Tip: Use the Finance role for team members who only need BillingOne access. Engineer and Finance are only set here, not in IdentityOne. See Invite people and set app permissions.
Billing Integrations
This is the most important settings section for BillingOne — it's where you connect your billing tools.
Pax8
Connect your Pax8 account to sync subscriptions:
- Click Configure next to Pax8
- Enter your Client ID and Client Secret (from the Pax8 partner portal)
- Click Test Connection to verify
- Click Save
Once connected:
- Subscriptions sync automatically
- You can trigger manual syncs from the Subscriptions page
- Client-to-company mapping becomes available
Xero / QuickBooks
Connect your accounting ledger (Xero and/or QuickBooks):
- Open Settings → Integrations
- Configure Xero or QuickBooks (platform OAuth or BYO)
- Sync contacts/customers, then map clients
- Import catalog and chart of accounts
When both Xero and QuickBooks are connected, set Settings → Billing → Primary accounting provider so catalog tax/CoA/CSV use the ledger you intend. Auto-push toggles for each provider stay independent.
Synergy Wholesale
Connect Synergy for Domains & Hosting visibility and entity-counter metering. Operational registrar actions remain in Synergy.
Billing (invoice generation)
Under Settings → Billing: reporting currency, invoice generation period/auto-generate, Pax8 pricing mode, email-on-generate, late fees, statements, CFO digest, MSP Stripe / autopay, and primary accounting provider (when both ledgers connected).
Notifications
Configure what notifications you receive:
- Email notifications for billing events
- In-app notification preferences
User activity
View recent staff activity (formerly “audit logs” in older docs):
- Who made changes and when
- Configuration updates
Tips
- Connect billable sources first — Pax8 and/or accounting, plus RMM/M365 in PanelOne for quantities
- Map clients before generate — Use Client mappings workbench
- Set primary provider if both Xero and QBO are connected
- Use the Finance role — BillingOne access without full PanelOne ops roles
- Review source trust before month-end generate